Crafting your own apple cider vinegar at home is both a rewarding and straightforward process. With just a few ingredients and some patience, you can create a versatile and healthy vinegar that can be used in cooking, cleaning, and even as a natural remedy. Follow this simple guide to make your own apple cider vinegar.
Ingredients:
- Apple scraps (peels, cores, or whole apples)
- 2 tablespoons of sugar (optional)
- Water
- A large glass jar
- Cheesecloth or a clean kitchen towel
- Rubber band or string
Instructions:
- Prepare the Apples:
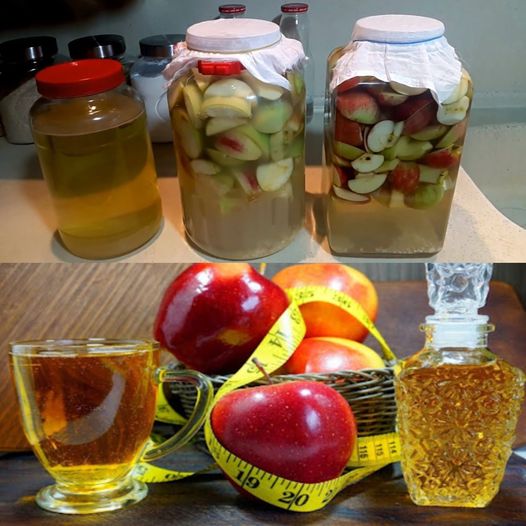
- Collect apple scraps, making sure to include peels and cores. You can also use whole apples if you prefer. Ensure the apples are free from mold or bruising.
- Fill the Jar:
- Place the apple scraps in a large glass jar, filling it about halfway. If you’re using whole apples, chop them into smaller pieces to fit.
- Add Sugar and Water:
- Dissolve 2 tablespoons of sugar in 1 cup of water. Pour this mixture over the apple scraps in the jar. Add more water to completely cover the apples, leaving about an inch of space at the top of the jar. The sugar helps to speed up the fermentation process but is optional.
- Cover the Jar:
- Cover the jar with cheesecloth or a clean kitchen towel and secure it with a rubber band or string. This allows the mixture to breathe while keeping out dust and pests.
- Fermentation Process:
- Place the jar in a warm, dark place. Let it sit for about 3-4 weeks, stirring daily with a clean spoon. During this time, the apples will ferment, and you’ll notice bubbles forming as the natural yeast converts the sugars into alcohol.
- Strain the Liquid:
- After 3-4 weeks, strain the liquid into a clean glass jar using a fine mesh strainer or cheesecloth. Discard the apple solids.
- Second Fermentation:
- Cover the jar again with the cheesecloth or kitchen towel and let it sit for another 3-4 weeks. This allows the alcohol to convert into acetic acid, turning it into vinegar. Stir occasionally and taste to check for the desired acidity.
- Bottling:
- Once the vinegar has reached your preferred taste, transfer it to a clean bottle with a tight-sealing lid. Store it in a cool, dark place. Your homemade apple cider vinegar will continue to mature and develop its flavor over time.
Conclusion
Making apple cider vinegar at home is an easy and fulfilling process that yields a versatile and healthful product. Whether you use it in your cooking, as a cleaning agent, or for its health benefits, homemade apple cider vinegar is a great addition to any household. Follow this guide to create your own batch and enjoy the natural goodness of homemade vinegar. Happy fermenting!